Pages

Tuesday, October 21, 2014

SharePoint 2013 Strange Issue - Method Not Found

In this post I want to share about the an Issue which I faced today when I was demonstrating certain features in SharePoint 2013.

SharePoint 2013 was setup on Azure VM (A4 - 8 Cores with 14 GB) for the Development environment. Since it is for Dev, I went ahead with the Standalone installation. Successfully Installed and was using from many days with no issues. Today suddenly I was facing the following issue:

Method not found: 'Void Microsoft.SharePoint.WorkflowServices.IWorkflowService.Upgrade(System.Object, System.String, Microso
ft.SharePoint.Upgrade.SPLog)


I am getting the same issue even while adding Add-PSSnapIn "Microsoft.SharePoint.Powershell" in SharePoint management Shall. 

Looked at the SP Logs & Event viewer where I can see many issues point to Cache Host is null or Cache Host is not present in the farm. Since its Standalone installation and configured on a workgroup machine I was ignoring this error and continued looking at the errors with no Luck.

The only change I can remember is that installing Worflow Manager 1.0 on the server. And showing SharePoint 2010 workflows in SharePoint Designer 2013.

Finally Looked at the Cumulative Updates on the server and decided to go with the SP1 installation. Unfortunately SP1 installation failed with no error message, so went ahead and restarted the machine and then re-initiated the installation which took good amount of time to complete.

I will suggest to look at the blog for speeding the SP1 installation as it consuming lot of time. After the installation I am able to run the PS Config Wizard successfully.

I hope this helps the SP Guys who are facing the similar issues.

Wednesday, March 20, 2013

LinkedIn is down today

When I try to access the LinkedIn today, it was down may be because of some issue or may be because of the maintenance activity.

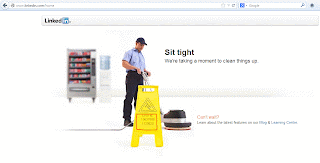
The point I want to make it here is how they presented the error message as shown here:

This picture engages the user that they are working on issue. If you observe the picture you can even identify the error id as well :)


Monday, February 11, 2013

Installing & Configuring the Analysis Service in SharePoint Mode


Microsoft SQL Server PowerPivot extends SharePoint and Excel Services to add server side process for the PowerPivot workbooks published to SharePoint.

In this blog I am going to explain on how to install and configure Analysis Service in SharePoint Mode. First lets look at the software requirements:
  • SQL Server 2012 Service Pack1
  • SharePoint 2013 Enterprise Edition
  • PowerPivot add-in for SharePoint 2013
SQL Server PowerPivot for SharePoint is only available with SQL Server 2012 Service Pack-1. This can be installed on a server running SharePoint 2013 or even on a different server with no dependencies on SharePoint 2013.

I am going to add one more virtual server "VMServer20" to the existing SharePoint farm explained in my previous post "Configuring Office Web Apps 2013 with SharePoint 2013" as shown below:


Here are the basic steps for this installation & configurations:

1. Installing PowerPivot for SharePoint
2. Configuring the Analysis Service in SharePoint Mode
3. Installing PowerPivot on SharePoint Servers
4. Configure PowerPivot for SharePoint
5. Verifying with a Sample

Step-1: Installing PowerPivot for SharePoint:

Run SQL Server Setup on the Server where you want to install SQL Server PowerPivot for SharePoint, in my case it is VMServer21. Make sure that the server is added to the Domain and run the setup as an administrator and also make sure you logged in with the Setup Account:


Click on the New SQL Server stand-alone installation or add features to an existing installation


Click OK to continue (make sure all the supported rules are passed)


Provide the license key and Click Next to continue


Select the I accept the license terms and Click Next to continue


Click Next to Continue, in case of any warnings for Windows Firewall rule, you can fix it ever after installing. It also might vary based on which environment we are setting up this server (like DMZ).


Here is the important step for this installation, Select SQL Server PowerPivot for SharePoint and Click Next to proceed further.

In this step Optionally you can select Add SQL Server database relation service engine to this installation in case if you want add this server as a content database to the SharePoint farm.


Click Next to proceed. If required you can change the default directory path.


Click Next to Proceed further.


This is another important step in this installation, make sure that the powerpivot instance is available on the server as its mandatory to install only on named instance called "POWERPIVOT".

Click Next to proceed.


Click Next to Proceed.


Provide the domain account on which you want to run this service and Click Next to continue.


If you want to run the instance in Mixed Mode, provide the password for the SA account. Add the current user to the administrators list. Click Next to proceed.


Add the current user to the Administrators list and click Next to continue.

Click Next to proceed.


Click Next to Proceed.

Click Next to Proceed with the Installation.


With this we completed installing SQL Server PowerPivot for SharePoint.


Step-2: Configuring the Analysis Service in SharePoint Mode:

Configure the Excel Services Domain Account which is configured in the SharePoint as part of the Administrator in the Analysis Service. In order to add this account, Open Management Studio & connect to the Analysis Service (VMServer20\PowerPivot) -> Right Click and select properties and Add the account as shown below:


Step-3: Installing PowerPivot Add-In for SharePoint:

Download and install Powerpivot Add-In for SharePoint on all the Web Front End Servers as well as on App Servers. First start with installing on the Central Admin Server by running spPowerPivot.msi


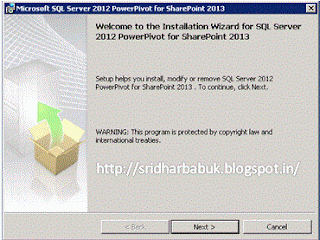
Click Next to Continue.


Accept the License Terms and Click Next to Continue.

Click Next to Continue.

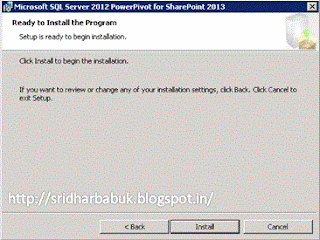
Click Install to initiate the installation.


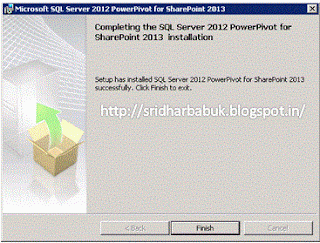
Click Finish to complete the installation of PowerPivot Add-In for SharePoint.


Step-4: Configuring PowePivot for SharePoint

Open the PowerPivot for SharePoint 2013 Configuration tool in Central Admin Server as shown below:


Select Configure or Repair Powerpivot and Click OK to continue.

Provide the Default Domain Account, Content Database and PowerPivot database instance. Click on Validate to verify the configurations.


Click Run to provision the PowerPivot Service Application in the Farm.


With this we completed the configurations. Now we are ready to verify the same.
Now you can install the PowerPivot Add-In on all the other servers in the SharePoint farm.

Step-5: Verifying the Configurations

You can verify the configurations by Browsing to the Central Admin -> Manage Service Applications, You will see new Service Application called "Default PowerPivot Service Application" as shown in the following image:

Click on Excel Service and Select Manage from the ribbon.

Select Data Model Settings and you will see the PowerPivot instance of the Analysis Service.
Now lets open a sample excel workbook which is published to excel and try slicing the data.


With this we completed Installing, Configuring & Validating the SQL Server PowerPivot for SharePoint 2013.

Let me know your comments!!!

Thursday, January 24, 2013

Configuring Office Web Apps 2013 with SharePoint 2013

Here is my first blog in this year which I want to provide my hands on experience on how to configure Office Web Apps 2013 with SharePoint 2013 on Premises.

As we know that the Office Web Apps is now a separate product which allows users to view and optionally update office documents using a supported browsers. This not only works on desktop but also supported on mobile devices likes Windows Phones, iPhone and iPads too.

Office Web Apps 2013 comes with improved features and architecture which allows Office Web Apps to provide view capability for Exchange Server 2013 & Lync 2013. In blog post I will explain how we can install & configure the same for SharePoint 2013 on premises environment especially for the developers & SharePoint Administrators.

Here is how my existing SharePoint Farm which I use for development purpose and to simulate the QA/Prod environments:


In this blog I am assuming that the SharePoint farm is available to configure Office Web Apps (OWA). Here are the Simple 9 steps to configure the same:

Step-1: Preparing Server with Prerequisite Software

There are certain prerequisites for installing OWA and make sure the following prerequisites are installed on the server in our case it is VMServer21.


Step-2: Preparing Server with Prerequisite Configurations


There are certain features to be enabled for OWA installtion, we can enable that using following PowerShell script in the Windows PowerShell Command prompt. Make sure that the you are opening PowerShell prompt as administrator.

For Windows Server 2008 R2

Import the necessary module before by executing the following command:

Import-Module ServerManager

And then run the following command:

Add-WindowsFeature Web-Server,Web-WebServer,Web-Common-Http,Web-Static-Content,
Web-App-Dev,Web-Asp-Net,Web-Net-Ext,Web-ISAPI-Ext,Web-ISAPI-Filter,Web-Includes,
Web-Security,Web-Windows-Auth,Web-Filtering,Web-Stat-Compression,
Web-Dyn-Compression,Web-Mgmt-Console,Ink-Handwriting,IH-Ink-Support


For Windows Server 2012

Run the following command:

Add-WindowsFeature Web-Server,Web-Mgmt-Tools,Web-Mgmt-Console,Web-WebServer,
Web-Common-Http,Web-Default-Doc,Web-Static-Content,Web-Performance,
Web-Stat-Compression,Web-Dyn-Compression,Web-Security,Web-Filtering,
Web-Windows-Auth,Web-App-Dev,Web-Net-Ext45,Web-Asp-Net45,Web-ISAPI-Ext,
Web-ISAPI-Filter,Web-Includes,InkandHandwritingServices

After completion of executing the command restart the machine.

Step-3: Installing Office Web Apps Server

Download Office Web App Server from Microsoft Download Center and you can extract the files from the image using any image extract softwares like MagicISO.

After extracting the files from the image, run Setup.exe.

Step-4: Installing Language Packs for Office Web Apps Server

Download necessary language packs from the Microsoft Download Center and run the WebAppsServerLP_en-us_x64.exe

Step-5: Creating Office Web Apps Server Farm

Planning Office Web Apps Server farm is very important based on how we are going to leverage, based on that we have to plan for load balancer, Number of servers, Certificates and so on. In this blog post we are going to see how to configure single server farm on HTTP.

Before configuring make sure that there no applications running on a default port as it is going to be used by OWA. To create a OWA single server farm execute the following PowerShell Command:

New-OfficeWebAppsFarm –InternalURL "http://vmserver21" –AllowHttp -EditingEnabled

Lets see what are these parameters means:

-InternalURL - is the name of the server that runs OWA, in our example it is vmserver21. In case of multiple server farm we have to provide the DNS configured in load balancer.

-AllowHttp - configures the farm to support HTTP.

-EditingEnabled - enables editing in office web apps especially when you want to edit the document from SharePoint.

Here is how it looks after running the command:


Step-6: Verifying Office Web Apps Server Farm

You can validate whether Office Web Apps Server Farm by executing the following URL:

http://vmserver21/hosting/discovery

and gives an xml output as shown below:


In case if you are not getting XML output as shown in the above picture and getting error related registering httpmodules, execute the following command to register ASP.Net framework 4.0 with IIS:

%systemroot%\Microsoft.NET\Framework64\v4.0.30319\aspnet_regiis.exe -iru 
 

Following image shows the output of this command:


After completing this command don't forget to reset IIS by executing IISRESET command in the same command prompt.

With these steps we completed installing OWA 2013 and Configuring it successfully. Now lets see how to configure SharePoint to use OWA.

Step-7: Configuring SharePoint 2013 to use OWA

We can configure SharePoint to use OWA by executing following Powershell Commandlet in Central Admin Server:

New-SPWOPIBinding -ServerName vmserver21.global.com -AllowHTTP

Following screenshot shows the output of the commandlet:


Office Web Apps Server uses the concept of zones to determine which URL (internal or external) and which protocol (HTTP or HTTPS) to use when it communicates with the host, which in this case isSharePoint 2013. By default, SharePoint Server 2013 uses the internal-https zone. Verify that this is the current zone by running the following command:

Get-SPWOPIZone 

In case if the output shows other than internal-http as we are using http protocol to communicate with OWA Server, you can set it by executing the following commandlet:

Set-SPWOPIZone  "internal-http"

Step-8: Configuring SharePoint 2013 Security Token Service to allow OAuth Over HTTP protocol

To use Office Web Apps withSharePoint 2013 over HTTP in a test environment, you must set AllowOAuthOverHttp to True, Otherwise Office Web Apps will not work.

$config = (Get-SPSecurityTokenServiceConfig)
$config.AllowOAuthOverHttp = $true
$config.Update()
 The output of these commands is as shown below:


Step-9:  Final Step is Testing OWA is Working as expected

The final step is to test the OWA is working as expected, in order to do this step open the existing site in a browser and upload couple of office documents and following image demonstrates the same:


You can test by clicking on the document which opens within the browser and don't forget to look at the URL as the SharePoint uses WOPI interface (/_layouts/15/WopiFrame.aspx) to render the document

With this we successfully completed the configuration of SharePoint 2013 to Use Office Web Apps.


Thursday, October 11, 2012

SQL Server 2012 - Plan Guides

You will be wondering what is this new item called "Plan Guides" in Programmability section of a database in SSMS 2012 as shown below:


SQL Server 2012 comes with many features, Plan Guides is one among them.

Plan Guides will let you optimize the performance of the query without modifying the actual query. In most of the real time scenarios the queries might be embedded in the application code itself and we will not have flexibility to modify/optimize the query within the application, this feature definitely helpful in these kind of scenarios.
There are three types of Plan Guides:
SQL Plan Guide
     This matches the queries which are executed in standalone statements.

Object Plan Guide
     This matches the queries which are executed within the contest of User Defined Functions, Stored Procedures and Triggers.
 
Template Plan Guide
     This matches the standalone queries which can be parametrized to a specified form.

Note that the Plan Guide can be created either by using Management Studio or Transact SQL. I will Transact SQL for all the examples.

Lets take an example to see how SQL Plan Guide works.Let starts with exploring the sp_create_plan_guide procedure.

sp_create_plan_guide procedure is used to create a plan guide for associating the hints to the queries. This built in procedure takes following parameters:

@name -> To provide the name for the Plan Guide
@stmt -> SQL Query Statement where you want to associate the hints
@type -> To Specify the type of the Plan Guide (SQL | Object| Template)
@module_or_batch -> To Specify the object name from the SQL Statement
@params -> To specify query parameters (it is must in case of Type is Template)
@hints -> To specify the hint Option

Now lets create a table and load with dummy data using the following script:

Create Table dbo.Employee
(
    Empno int Identity(1,1) Primary Key,
    EmpName varchar(200) Not Null,
    DOB DateTime Not Null,
    Salary float
)

-- Load Dummy Data for Testing
INSERT INTO dbo.Employee (EmpName, DOB, Salary)
SELECT TOP 10000              
     Enames.FullName,
     CAST(RAND(CHECKSUM(NEWID()))*3653.0+CAST(CAST('01-Jan-1950' as DateTime) - CAST('01-Jan-1900' as DateTime) AS INT) AS DATETIME) AS Date,               
     CAST(RAND(CHECKSUM(NEWID())) * 10000 as Float)
FROM sys.all_columns T1         
CROSS JOIN sys.all_columns T2
CROSS APPLY (
    SELECT EName AS 'data()'
    FROM (
        SELECT TOP (CAST(RAND(CHECKSUM(NEWID())) * T1.column_id * T2.column_id as INT) %2 + 1) EName
        FROM (
        SELECT EName = CAST('Sridhar ' AS VARCHAR(200)) UNION ALL
        SELECT 'Kolapalli ' UNION ALL
        SELECT 'David ' UNION ALL
        SELECT 'Robert ' UNION ALL
        SELECT 'Rajesh ' UNION ALL
        SELECT 'Naresh ' UNION ALL
        SELECT 'Babu ' UNION ALL
        SELECT 'Thomas ' UNION ALL
        SELECT 'Rich ' UNION ALL
        SELECT 'Anthony' UNION ALL
        SELECT 'Richard'
        ) ENames ORDER BY NEWID()) u2
    FOR XML PATH('')        
) Enames(FullName)

-- Create a Index on Employee Name
Create Index Indx_Emp_Name on dbo.Employee(EmpName)

Lets execute a sample query and see how is the execution plan for the same query:

SELECT count(*) from dbo.Employee E1 INNER JOIN dbo.Employee E2 on E1.EmpName = E2.EmpName

If you closely observe the execution plan for this query, it uses Merge Join.


Now lets see how we can use the Plan Guides to add the hint to the query without modifying the underlying query. Lets create the plan guide with the following TSQL snippet:

EXEC sp_create_plan_guide
    @name =  N'SriSampleGuide1',
    @stmt = N'SELECT count(*) from dbo.Employee E1 INNER JOIN dbo.Employee E2 on E1.EmpName = E2.EmpName',
    @type = N'SQL',
    @module_or_batch = NULL,
    @params = NULL,
    @hints = N'OPTION (TABLE HINT( E1, FORCESEEK))'

This plan guides adds table hint to the query statement mentioned as one of the parameter. Now let try executing the same and see the execution plan, it uses the Table Hint provided in the plan guide.

SELECT count(*) from dbo.Employee E1 INNER JOIN dbo.Employee E2 on E1.EmpName = E2.EmpName

The execution plan for this query looks as:


Note that this sample is only to show how we leverage use plan guides.

Plan Guide is one of the good feature in SQL Server 2012 which helps in optimizing the query without modifying the underlying query. I am sure every application developer appreciate this feature.

Note that creating plan guide either on Object/SQL/template removes the query plan from the plan cache which might impact the overall query performance and also the performance depends on the plan guide too. I will suggest to use plan guide cautiously.


Wednesday, September 5, 2012

SQL Server 2012 - FileStream Enhancements

This post explains the FileStream Concept and its Enhancements in SQL Server 2012 with an example. At a high level this post covers following topics:
  • What is FileStream
  • How to Configure FileStream
  • An Example to leverage FileStream
  • FileStream Enhancements in SQL Server 2012
First we will look at what is FileStream. In Short FileStream is the ability to store unstructured data like documents, images on the file system but still be managed by SQL server, which means these files are part of Database Managment activities like Backup & Restore.

By Default FileStream is Disabled for database server instance. This feature can be configured during the SQL Server Installation or even post Installation. Following steps explain on how we can enable & configure FileStream.

Open SQL Server Configuration Manager by Clicking Start -> All Programs -> Microsoft SQL Server 2012 ->  Configuration Tools Folder -> SQL Server Configuration Manager

In the SQL Server Configuration Manager console highlight the SQL Server Services as shown in the picture


Select the SQL Server instances in the right pane for which you want to enable FILESTREAM, Right click on the server and select properties as shown in the picture:


In the property window select FileStream Tab as shown below


Check the FILESTREAM For Transact-SQL Access to enable FileStream and then select Enable FILESTREAM For File I/O Access so that we can read and write data from Windows. And also type the name of the Windows share name "FileStreamShare" or you can even leave it to default value as shown below


If there is a need for the remote clients to access the data then we need to enable Allow Remote Clients Access To FILESTREAM Data otherwise leave it to default. Now go ahead click Apply followed by OK button.

With this we completed enabling FileStream on a SQL Server Instance. Now we will see in the following steps on we can enable this feature for a particular database.

Let us start with creating a Database called "FileStreamSample" using following script which is generated in SSMS (SQL Server Management Studio).

To execute the script, Open SSMS by Clicking Start -> All Programs -> Microsoft SQL Server 2012 -> SQL Server Management Studio and then copy & paste following code. Now execute the code either by pressing F5 key in the keyboard or by clicking on execute icon.

CREATE DATABASE [FileStreamSample]
 CONTAINMENT = NONE
 ON  PRIMARY
( NAME = N'FileStreamSample', FILENAME = N'C:\Program Files\Microsoft SQL Server\MSSQL11.MSSQLSERVER\MSSQL\DATA\FileStreamSample.mdf' , SIZE = 3072KB , FILEGROWTH = 1024KB )
 LOG ON
( NAME = N'FileStreamSample_log', FILENAME = N'C:\Program Files\Microsoft SQL Server\MSSQL11.MSSQLSERVER\MSSQL\DATA\FileStreamSample_log.ldf' , SIZE = 1024KB , FILEGROWTH = 10%)
GO
ALTER DATABASE [FileStreamSample] SET COMPATIBILITY_LEVEL = 110
GO
ALTER DATABASE [FileStreamSample] SET ANSI_NULL_DEFAULT OFF
GO
ALTER DATABASE [FileStreamSample] SET ANSI_NULLS OFF
GO
ALTER DATABASE [FileStreamSample] SET ANSI_PADDING OFF
GO
ALTER DATABASE [FileStreamSample] SET ANSI_WARNINGS OFF
GO
ALTER DATABASE [FileStreamSample] SET ARITHABORT OFF
GO
ALTER DATABASE [FileStreamSample] SET AUTO_CLOSE OFF
GO
ALTER DATABASE [FileStreamSample] SET AUTO_CREATE_STATISTICS ON
GO
ALTER DATABASE [FileStreamSample] SET AUTO_SHRINK OFF
GO
ALTER DATABASE [FileStreamSample] SET AUTO_UPDATE_STATISTICS ON
GO
ALTER DATABASE [FileStreamSample] SET CURSOR_CLOSE_ON_COMMIT OFF
GO
ALTER DATABASE [FileStreamSample] SET CURSOR_DEFAULT  GLOBAL
GO
ALTER DATABASE [FileStreamSample] SET CONCAT_NULL_YIELDS_NULL OFF
GO
ALTER DATABASE [FileStreamSample] SET NUMERIC_ROUNDABORT OFF
GO
ALTER DATABASE [FileStreamSample] SET QUOTED_IDENTIFIER OFF
GO
ALTER DATABASE [FileStreamSample] SET RECURSIVE_TRIGGERS OFF
GO
ALTER DATABASE [FileStreamSample] SET  DISABLE_BROKER
GO
ALTER DATABASE [FileStreamSample] SET AUTO_UPDATE_STATISTICS_ASYNC OFF
GO
ALTER DATABASE [FileStreamSample] SET DATE_CORRELATION_OPTIMIZATION OFF
GO
ALTER DATABASE [FileStreamSample] SET PARAMETERIZATION SIMPLE
GO
ALTER DATABASE [FileStreamSample] SET READ_COMMITTED_SNAPSHOT OFF
GO
ALTER DATABASE [FileStreamSample] SET  READ_WRITE
GO
ALTER DATABASE [FileStreamSample] SET RECOVERY FULL
GO
ALTER DATABASE [FileStreamSample] SET  MULTI_USER
GO
ALTER DATABASE [FileStreamSample] SET PAGE_VERIFY CHECKSUM 
GO
ALTER DATABASE [FileStreamSample] SET TARGET_RECOVERY_TIME = 0 SECONDS
GO
USE [FileStreamSample]
GO
IF NOT EXISTS (SELECT name FROM sys.filegroups WHERE is_default=1 AND name = N'PRIMARY') ALTER DATABASE [FileStreamSample] MODIFY FILEGROUP [PRIMARY] DEFAULT
GO

Once Database is created, Select the database and click on "New Query" Icon as shown below:


Now we have to configure the file stream access level for the database "FileStreamSample" by executing the following Transact-SQL code.

EXEC sp_configure filestream_access_level, 2
RECONFIGURE

There are three access level options for FileStream as described below:

0 -> No FileStream Support
1 -> Enable FileStream for Transact-SQL access only
2 -> Enable FileStream for Transact-SQL as well as Win32 Streaming access

In our example we are going with the last option as to provide support for Win32 Streaming.

Now In Query Editor, type the above Transact-SQL code and then click on Execute as shown below:


The final step is to configuring File Group & Database Files to store FileStream Data. Execute the following commands in the Query Editor:

Use Master
ALTER DATABASE [FileStreamSample]
ADD FILEGROUP [FileStreamSampleFG] CONTAINS FILESTREAM
GO
ALTER DATABASE [FileStreamSample]
ADD FILE (
NAME = N'FileStreamSample_FilestreamFile',
FILENAME = N'C:\FileStreamSample_FilestreamFile'
) TO FILEGROUP
[FileStreamSampleFG]
GO


We can also create the File Group and Files using Managment Studio Interface itself but its always easy to go with Transact-SQL Script.

Now lets create a table using following SQL Script:

Create Table [FSExample]
(
    [fid] uniqueidentifier ROWGUIDCOL  NOT NULL Unique,
    [sid] [int] NOT NULL Unique,
    [fcontent] [varbinary](max) FileStream NULL
)

There are certain point we need to keep in mind while designing tables containing FileStream. Here are few important point:

1. FileStream columns must be accompanied by a corresponding uniqueidentifier ROWGUID column.
2. These kind of table must also be accompanied by a unique index
3. ROWGUIDCOL is required if we need to access FileStream data using Win32 APIs
4. FileStream File Groups and Containers should reside on volumes other than the OS

All the DML operations are pretty much same as any other table. Following are some of the examples:

Insert Into FSExample values (newid(), 1, CAST('my first content' as varbinary(max)))

Select * from FSExample

Update FSExample
    Set fcontent = CAST('Updated content' as varbinary(max))
WHERE sid = 1

Select * from FSExample

Delete FROM FSExample WHERE sid=1

Select * from FSExample

While executing these commands keep an eye on folder "C:\FileStreamSample_FilestreamFile", you will notice news files after insert operations.

FileStream Enhancements in SQL Server 2012

There are many enhancements to FileStream in SQL Server 2012. Some of them are:

Ability to support multiple containers & file groups
Ability to specify the max size for the containers
Ability to add multiple storage devices for scalability

You can refer to my previous post on GC related improvements @ SQL Server FileStream GC Made Easy